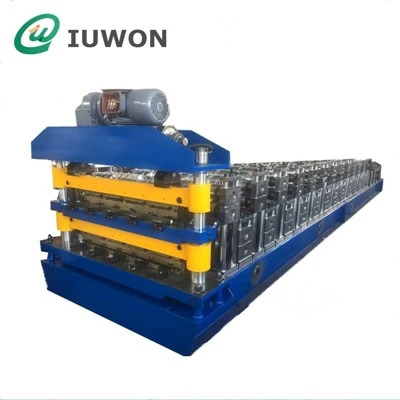

Installing a cable tray former is a crucial step in setting up an efficient cable management system. As a reputable Cable Tray Former supplier, we understand the importance of a proper installation process. In this blog, we will guide you through the step - by - step process of installing a cable tray former.
Step 1: Planning and Preparation
Before you start the installation, it is essential to plan thoroughly. First, you need to determine the route where the cable tray will be installed. Consider factors such as the location of electrical equipment, the path of cables, and any potential obstacles. Make sure to measure the length and width of the area accurately.
You can refer to our Cable Tray Former product page to understand the specifications and dimensions of our cable tray formers. This will help you choose the right equipment for your project.
Gather all the necessary tools and materials. You will need a drill, screwdriver, measuring tape, level, and appropriate fasteners. Ensure that you have safety equipment such as gloves and safety glasses.
Step 2: Mounting the Support Structure
The support structure is the foundation for the cable tray former. It provides stability and ensures that the cable tray can carry the weight of the cables.
First, mark the locations where the support brackets will be installed. Use a level to ensure that the marks are straight and even. Drill holes at the marked locations and insert the appropriate fasteners, such as anchors or bolts.
Install the support brackets onto the fasteners. Make sure that the brackets are securely attached and level. The spacing between the brackets will depend on the type and size of the cable tray. Generally, for smaller cable trays, the brackets can be spaced closer together, while for larger trays, a greater distance between brackets is acceptable.
Step 3: Assembling the Cable Tray Former
Our Cable Tray Forming Machine is designed to produce high - quality cable trays. Once you have the cable tray components, start assembling them.


Begin by laying out the sections of the cable tray on a flat surface. Align the sections carefully and use the provided connectors to join them together. Make sure that the connections are tight and secure.
For corner sections, ensure that the angles are correct and that the tray fits smoothly around the corners. You may need to use additional fasteners or brackets to reinforce the corners.
Step 4: Installing the Cable Tray on the Support Structure
Once the cable tray is assembled, it is time to install it on the support structure. Lift the cable tray and place it onto the support brackets. Make sure that the tray is centered and level on the brackets.
Use fasteners to secure the cable tray to the brackets. The type of fasteners will depend on the material of the cable tray and the support structure. For example, if the cable tray is made of metal and the support brackets are also metal, you can use bolts and nuts.
Check the alignment of the cable tray again to ensure that it is straight and level. Adjust the position of the tray if necessary.
Step 5: Connecting the Cable Tray Sections
If you are installing a long cable tray system, you will need to connect multiple sections together. Use the appropriate connectors to join the sections. Make sure that the connectors are properly installed and that the joints are tight.
Check for any gaps or misalignments between the sections. If there are any, adjust the sections and re - tighten the connectors.
Step 6: Adding Accessories
Cable tray systems often require accessories such as covers, dividers, and bends. Install these accessories according to your specific requirements.
Covers can be used to protect the cables from dust, debris, and other environmental factors. Dividers can be used to separate different types of cables. Bends are used to change the direction of the cable tray.
Make sure that the accessories are properly installed and that they fit securely onto the cable tray.
Step 7: Testing and Inspection
After the installation is complete, it is important to test and inspect the cable tray system. Check for any loose connections, misalignments, or other issues.
Verify that the cable tray can support the weight of the cables. You can do this by placing a test load on the tray and observing its performance.
Check for any electrical continuity if the cable tray is part of an electrical grounding system. Ensure that all the connections are properly grounded.
Step 8: Maintenance and Monitoring
Once the cable tray system is installed and tested, it is important to perform regular maintenance and monitoring. Check the cable tray for any signs of damage, corrosion, or wear.
Inspect the fasteners and connectors regularly to ensure that they are tight and secure. Replace any damaged or worn components as needed.
Monitor the cable tray system for any changes in performance, such as increased vibration or noise. Address any issues promptly to prevent further damage.
Conclusion
Installing a cable tray former is a complex but rewarding process. By following the steps outlined in this blog, you can ensure a successful installation of your cable tray system.
As a leading Cable Tray Former supplier, we are committed to providing high - quality products and excellent customer service. If you have any questions or need further assistance with your cable tray installation project, please feel free to contact us. We are here to help you choose the right products and ensure that your installation is a success. Whether you are a small business or a large industrial project, our team of experts can provide you with the support you need. Start your cable tray installation project today and experience the difference our products can make.
References
- Electrical Installation Handbook, 4th Edition
- National Electrical Code (NEC)
- Cable Tray Manufacturer's Installation Guides